WC0M Home
Amateur Radio Station
WC0M
(Formerly: WC0EM, WF0GM)
My Tower Installation
(Page 4 of 4)
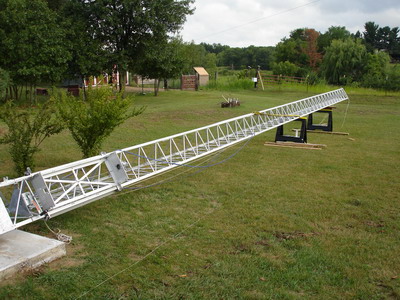
Well at this point I had all
the sections bolted together, the guy cables attached, and the tower up on saw
horses. The only thing left to do was to figure out how rig up a strap to pull
the tower up with.
I used a tow strap to cradle the tower at 30 feet. I then tied a
piece of rope to the center of the cradle so that I could pull the tow strap off
the tower after the tower was vertical. The other end of the tow strap was
attached to my pickup truck. At 20 feet up, I attached a very large rope in the
same fashion as the tow strap.
Then that night we had a very
nasty thunder storm with high winds. I was worried that the tower may get blown
off of the saw horses, but thankfully, it did not. (I later found out that my
neighbor had lost a few large oak trees in that storm.)
The next morning the sun
rose to a partly cloudy sky and finally the big day had arrived. This was the
day scheduled for raising the tower! It was Saturday morning July 14, 2007. Soon
the guys began to arrive. I talked some of them in on a local repeater, since
half of them had never been to my QTH.
This is how it all worked
out.
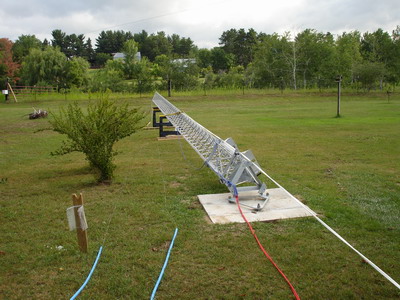
Several fellas were positioned to lift the tower off of the saw horses and walk it
up as I pulled it up with my pickup truck. Another fella pulled on the large
rope attached at 20 feet. Also there was a man positioned to pull on each one of
the guy wires. A couple of the fellas were ready to bolt the hinge plate to the
base plate once it was fully vertical. It took only about 50 seconds to get it
vertical, and another 4 minutes or so to get the hinge plate bolted down onto the base
plate. The holes in the base plate lined up fairly well with the hinge plate. I
had to grab a crowbar to nudge the hinge plate over just a hair to provide
clearance for a couple of the bolts. Then it took probably another 20 minutes or
so to attach the guy wires to the earth anchors. So from start to finish, it
took about a half an hour to secure the tower in place. Not bad. All that
advance planning really paid off!
And of course the most important thing of
all: no one had gotten hurt.
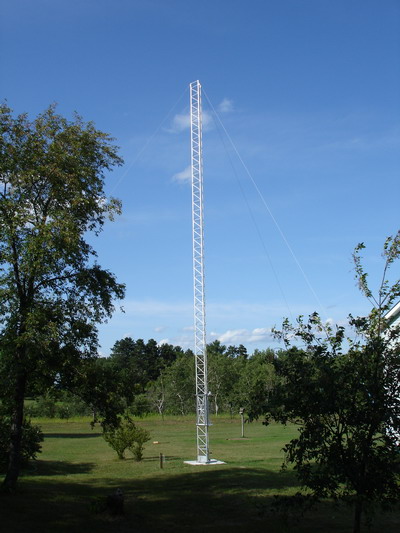
A brand new shiny 50 foot tower is born!

During the following week, I
spent some time getting the rotor and thrust bearing installed on the Hazer. I
already had a very nice piece of stainless steel pipe I had used for a mast at
my old QTH. So I installed the same piece of pipe for the mast on my new tower.
Here is when I was ready to attach my lightning rod. And as I was doing
so, I realized that I needed another messenger line kit to support it. So the
next day on July 16, I called up GME to order an additional messenger line kit.
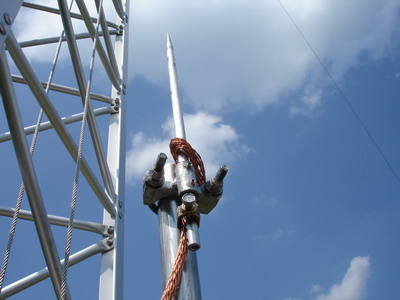
The Lightning Rod
Ground Wire w/stainless steel Messenger Line cable.
I called the county to set up
Friday, July 20th as the final inspection day. I was home to greet the
inspector at 9:00 AM that morning. He was pretty impressed with the job and had no
reservations with signing off the final approval. I was very glad to have done
things the correct and legal way, because I did not want to
have to deal with the possibility of having to remove the tower
should someone complain about it.
Now it was time to begin reassembling my
Cushcraft A3 tri-band HF beam antenna. I cleaned up all the joints where the
elements came together. This was something I took my time at because after being
installed at my old QTH for 8 years, this was the first time I had ever taken
the time to clean it up. And it needed it!
I laid the beam out in the
yard, and only attached the driven element to begin with. I used some spray on Di-Electric
grease at each joint, and I found that a half dozen new stainless steel hose
clamps were required to secure some elements in place.
Then I mounted the boom
with the driven element to the mast. I later attached the reflector and director
elements standing right there on the ground. I next disconnected two of the guy
wires to get them out of the way of the antenna elements while raising it.
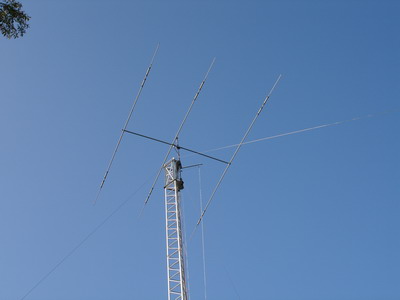
I
pointed the beam at 195 degrees for good clearance, and on Wednesday July 25,
2007 I had that beam on the tower and raised it up there for the first time. The
Hazer with my antenna cranked up fairly smoothly. I watched as the rotor turned
the beam around a full 450 degrees. (The Yaesu G-1000DXA rotor can travel 90
degrees past a full 360 degrees, called "overlap".) I noticed that the lightning
ground wire was rubbing on the feed line a bit as the antenna turned, so I
lowered the whole thing, made a few adjustments, and raised it back up. This
time I was satisfied with the installation.
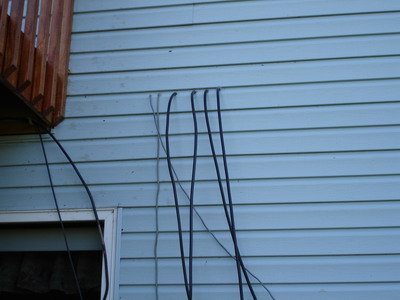
Feed lines A & B and the a braided station ground wire were already
installed before the winter of 2006/2007.
Feed line A goes to a Comet GP-9M 2m/70cm dual band stick,
B to a 75m/40m dipole.
New feed line C to the A3 HF beam, and D to a 80m/17m dipole on the tower.
The next day I added two new
feed lines and the rotor control cable. I fed the coax
(Times Microwave LMR®-400-UF ultra flex) and the rotor cable through the wall
and into the shack. I finished the station ground and everything was hooked up
for my first QSO. So I did what any ham would do at this point. I turned on the
radio and made my first contact! I talked to Tom, K0HHB
near St. Louis, MO on 20 meters. He was running a Ten-Tec Corsair, and a Force 12 @ 25 ft.
and sounded great.

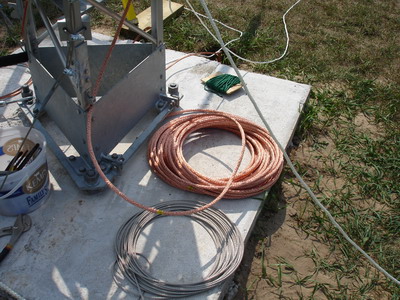
Each leg of the tower is grounded with an 8 foot copper-clad steel ground rod.
(The critter in the background is my XYL's angora goat, Blu.)
It was amazing to me how
broad-banded the antenna was. You see, I had previously had the A3 mounted on a
5 foot tripod on the roof of my old QTH. It was approximately 10 feet above the
peak of the roof there. I had never experienced a 55 foot clearance from the
ground before! I like this!

BlitzBug TM Lightning Arrestor
I use a BlitzBug TM Lightning
arrestor on each feed line outside the house. Every joint is sealed with
silicone rubber sealant to keep moisture out. I've used this method for twenty
years with very good success.
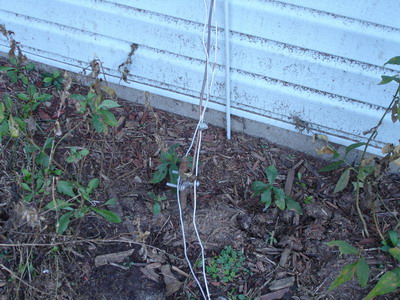
Station Ground
Then all is connected to an 8-foot ground rod located as near my operating
position as possible. I use a copper/tin braid wire to ground all the radio
equipment to this point.
I am very grateful to the friends
and family that took time out of their lives that Saturday morning in July 2007.
Without their help I could not have gotten that tower vertical.
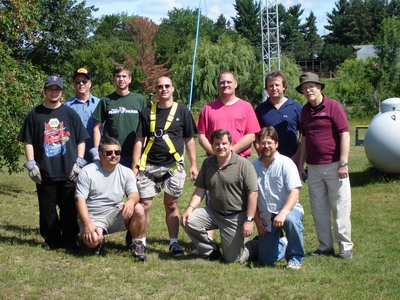
The Raising Crew
Back Row L to R: My son Ben, my father-in-law Ray, my other son Josh, Parry
KC0TWB (strapped into the climbing gear), Jay N0MDF, Rob KB0ABT, and Bob KC0GWD.
Front row
kneeling L to R: Larry N0OQA, Brad N0KLQ, and yours truly - Greg WC0M.
THANKS GUYS
de Greg - WC0M
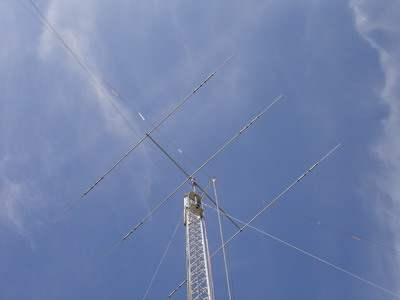
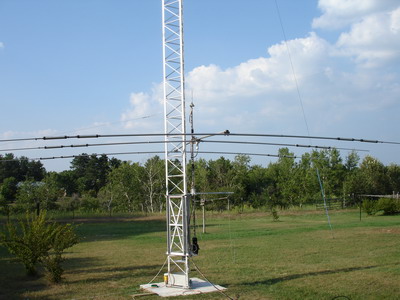
Here she is in all her glory with the Cushcraft A3s Tri-Band Beam, and an
inverted V dipole cut for 80m/17m.
Back to Page 3

Back to Station Photos page

WC0M Home